使用 Spring Boot + React 开发 CRUD 应用
1、简介
本文将会带你学习如何使用 Spring Boot 以及 React JavaScript 框架开发一个简单的 RESTful CRUD 应用。
2、Spring Boot
2.1、Maven 依赖
在 pom.xml 中添加如下依赖:
<dependencies>
    <dependency>
        <groupId>org.springframework.boot</groupId>
        <artifactId>spring-boot-starter-web</artifactId>
        <version>2.4.4</version>
    </dependency>

    <dependency>
        <groupId>org.springframework.boot</groupId>
        <artifactId>spring-boot-starter-data-jpa</artifactId>
        <version>2.4.4</version>
    </dependency>

    <dependency>
        <groupId>org.springframework.boot</groupId>
        <artifactId>spring-boot-starter-test</artifactId>
        <version>2.4.4</version>
        <scope>test</scope>
    </dependency>

    <dependency>
        <groupId>com.h2database</groupId>
        <artifactId>h2</artifactId>
        <version>1.4.200</version>
        <scope>runtime</scope>
    </dependency>
</dependencies>
如上,添加了 Web、Test、Spring Data JPA 以及 H2 依赖。
2.2、创建 Model
创建 Client 实体类,有 id、name 和 email 属性:
@Entity
@Table(name = "client")
public class Client {

    @Id
    @GeneratedValue
    private Long id;

    private String name;
    private String email;

    // 省略构造函数和 get/set 方法
}
2.3、创建 Repository
创建 ClientRepository Repository 接口,继承自 JpaRepository:
public interface ClientRepository extends JpaRepository<Client, Long> {
}
JpaRepository 已经预定义了很多 CRUD 方法。
2.4、创建 REST Controller
最后,创建 Rest Controller 提供 REST API 服务。
注入 ClientRepository,进行数据库交互。
@RestController
@RequestMapping("/clients")
public class ClientsController {

    private final ClientRepository clientRepository;

    public ClientsController(ClientRepository clientRepository) {
        this.clientRepository = clientRepository;
    }

    @GetMapping
    public List<Client> getClients() {
        return clientRepository.findAll();
    }

    @GetMapping("/{id}")
    public Client getClient(@PathVariable Long id) {
        return clientRepository.findById(id).orElseThrow(RuntimeException::new);
    }

    @PostMapping
    public ResponseEntity createClient(@RequestBody Client client) throws URISyntaxException {
        Client savedClient = clientRepository.save(client);
        return ResponseEntity.created(new URI("/clients/" + savedClient.getId())).body(savedClient);
    }

    @PutMapping("/{id}")
    public ResponseEntity updateClient(@PathVariable Long id, @RequestBody Client client) {
        Client currentClient = clientRepository.findById(id).orElseThrow(RuntimeException::new);
        currentClient.setName(client.getName());
        currentClient.setEmail(client.getEmail());
        currentClient = clientRepository.save(client);

        return ResponseEntity.ok(currentClient);
    }

    @DeleteMapping("/{id}")
    public ResponseEntity deleteClient(@PathVariable Long id) {
        clientRepository.deleteById(id);
        return ResponseEntity.ok().build();
    }
}
2.5、启动 API 服务
使用 spring-boot-maven-plugin 来启动服务:
mvn spring-boot:run
然后,就可以通过访问 http://localhost:8080/clients 获取 client 列表。
2.6、测试
使用 Postman 进行测试:
curl -X POST http://localhost:8080/clients -d '{"name": "John Doe", "email": "john.doe@baeldgung.com"}'
3、React
React 是一个用于创建用户界面(UI)的 JavaScript 库。使用 React 需要安装 Node.js,你可以先按照 Node.js 下载页面 的安装说明进行安装。
3.1、创建 React 应用
Create React App 是一个命令行工具,用于们生成 React 项目。
在 Spring Boot 应用根目录中运行以下命令,创建客户端应用:
npx create-react-app frontend
应用创建完成后,会在 frontend 目录中安装 Bootstrap、React Router 和 reactstrap:
npm install --save bootstrap@5.1 react-cookie@4.1.1 react-router-dom@5.3.0 reactstrap@8.10.0
使用 Bootstrap 的 CSS 和 reactstrap 的组件来创建更好看的 UI,并使用 React Router 组件来处理应用的导航功能。
在 app/src/index.js 中导入 Bootstrap 的 CSS 文件:
import 'bootstrap/dist/css/bootstrap.min.css';
3.2、启动 React UI
启动前端应用:
npm start
在浏览器中访问 http://localhost:3000,应该可以看到 React 示例页面:

3.3、调用 Spring Boot API
调用 Spring Boot API 需要配置 React 应用的 package.json 文件,以在调用 API 时设置代理。
在 package.json 中添加 API 的 URL:
...
"proxy": "http://localhost:8080",
...
接下来,编辑 frontend/src/App.js,使其调用 API 来显示 client 列表,包括 name 和 email 属性。
class App extends Component {
  state = {
    clients: []
  };

  async componentDidMount() {
    const response = await fetch('/clients');
    const body = await response.json();
    this.setState({clients: body});
  }

  render() {
    const {clients} = this.state;
    return (
        <div className="App">
          <header className="App-header">
            <img src={logo} className="App-logo" alt="logo" />
            <div className="App-intro">
              <h2>Clients</h2>
              {clients.map(client =>
                  <div key={client.id}>
                    {client.name} ({client.email})
                  </div>
              )}
            </div>
          </header>
        </div>
    );
  }
}
export default App;
在 componentDidMount 函数中,调用 client API,并将响应体设置在 clients 变量中。在 render 函数中,返回包含在 API 中找到的 clients 列表的HTML。
效果页面如下:
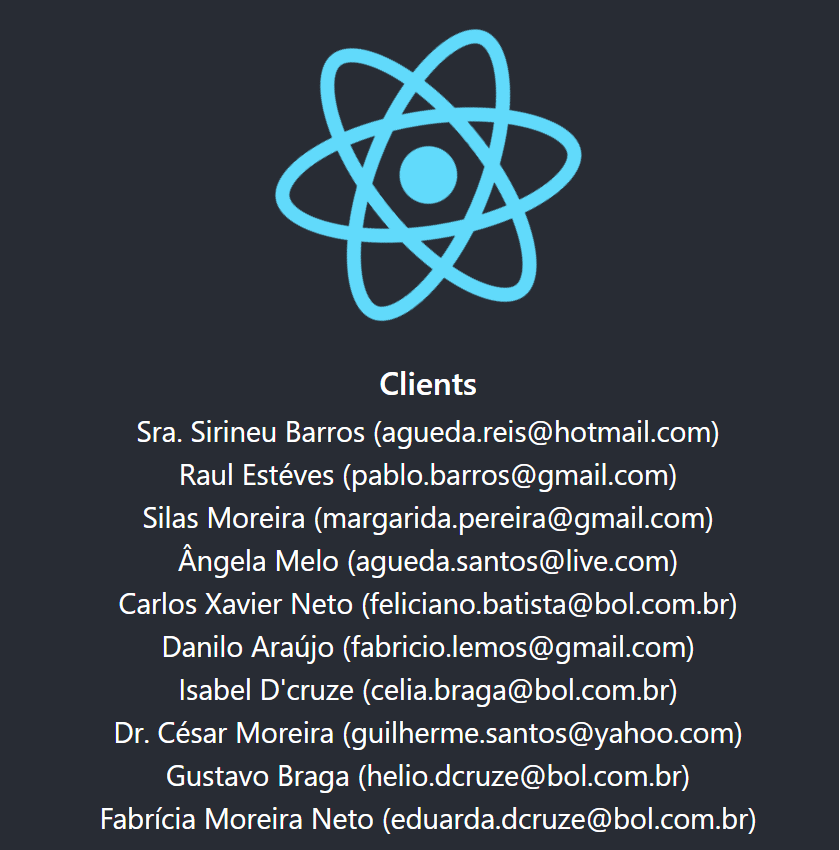
注意:必须先启动 Spring Boot 应用,以保证客户端能够调用 API。
3.4、创建 ClientList 组件
现在改进 UI,显示一个更复杂的组件,以便用于展示、编辑、删除和创建 client。
在 frontend 中创建 src/ClientList.js 文件:
import React, { Component } from 'react';
import { Button, ButtonGroup, Container, Table } from 'reactstrap';
import AppNavbar from './AppNavbar';
import { Link } from 'react-router-dom';

class ClientList extends Component {

    constructor(props) {
        super(props);
        this.state = {clients: []};
        this.remove = this.remove.bind(this);
    }

    componentDidMount() {
        fetch('/clients')
            .then(response => response.json())
            .then(data => this.setState({clients: data}));
    }
}
export default ClientList;
和 App.js 中一样,componentDidMount 函数会调用 API 来加载 client 列表。
还加入了 remove 函数,以便在删除客户端时处理对 API 的 DELETE 调用。还有 render 函数,用于渲染包含编辑、删除和添加 client 操作的 HTML:
async remove(id) {
    await fetch(`/clients/${id}`, {
        method: 'DELETE',
        headers: {
            'Accept': 'application/json',
            'Content-Type': 'application/json'
        }
    }).then(() => {
        let updatedClients = [...this.state.clients].filter(i => i.id !== id);
        this.setState({clients: updatedClients});
    });
}

render() {
    const {clients, isLoading} = this.state;

    if (isLoading) {
        return <p>Loading...</p>;
    }

    const clientList = clients.map(client => {
        return <tr key={client.id}>
            <td style={{whiteSpace: 'nowrap'}}>{client.name}</td>
            <td>{client.email}</td>
            <td>
                <ButtonGroup>
                    <Button size="sm" color="primary" tag={Link} to={"/clients/" + client.id}>Edit</Button>
                    <Button size="sm" color="danger" onClick={() => this.remove(client.id)}>Delete</Button>
                </ButtonGroup>
            </td>
        </tr>
    });

    return (
        <div>
            <AppNavbar/>
            <Container fluid>
                <div className="float-right">
                    <Button color="success" tag={Link} to="/clients/new">Add Client</Button>
                </div>
                <h3>Clients</h3>
                <Table className="mt-4">
                    <thead>
                    <tr>
                        <th width="30%">Name</th>
                        <th width="30%">Email</th>
                        <th width="40%">Actions</th>
                    </tr>
                    </thead>
                    <tbody>
                    {clientList}
                    </tbody>
                </Table>
            </Container>
        </div>
    );
}
3.5、创建 ClientEdit 组件
ClientEdit 组件将负责创建和编辑 client。
创建文件 frontend/src/ClientEdit.js:
import React, { Component } from 'react';
import { Link, withRouter } from 'react-router-dom';
import { Button, Container, Form, FormGroup, Input, Label } from 'reactstrap';
import AppNavbar from './AppNavbar';

class ClientEdit extends Component {

    emptyItem = {
        name: '',
        email: ''
    };

    constructor(props) {
        super(props);
        this.state = {
            item: this.emptyItem
        };
        this.handleChange = this.handleChange.bind(this);
        this.handleSubmit = this.handleSubmit.bind(this);
    }
}
export default withRouter(ClientEdit);
添加 componentDidMount 函数,以判断正在处理的是 “创建” 还是 “编辑” 功能;如果是编辑功能,它将从 API 获取 client 数据:
async componentDidMount() {
    if (this.props.match.params.id !== 'new') {
        const client = await (await fetch(`/clients/${this.props.match.params.id}`)).json();
        this.setState({item: client});
    }
}
然后,在 handleChange 函数中,更新组件 state 属性,该属性将在提交表单时使用:
handleChange(event) {
    const target = event.target;
    const value = target.value;
    const name = target.name;
    let item = {...this.state.item};
    item[name] = value;
    this.setState({item});
}
在 handeSubmit 中,调用 API,根据调用的功能,将请求发送到 PUT 或 POST 方法。为此,可以检查 id 属性是否已填充:
async handleSubmit(event) {
    event.preventDefault();
    const {item} = this.state;

    await fetch('/clients' + (item.id ? '/' + item.id : ''), {
        method: (item.id) ? 'PUT' : 'POST',
        headers: {
            'Accept': 'application/json',
            'Content-Type': 'application/json'
        },
        body: JSON.stringify(item),
    });
    this.props.history.push('/clients');
}
最后,render 函数用于处理表单。
render() {
    const {item} = this.state;
    const title = <h2>{item.id ? 'Edit Client' : 'Add Client'}</h2>;

    return <div>
        <AppNavbar/>
        <Container>
            {title}
            <Form onSubmit={this.handleSubmit}>
                <FormGroup>
                    <Label for="name">Name</Label>
                    <Input type="text" name="name" id="name" value={item.name || ''}
                           onChange={this.handleChange} autoComplete="name"/>
                </FormGroup>
                <FormGroup>
                    <Label for="email">Email</Label>
                    <Input type="text" name="email" id="email" value={item.email || ''}
                           onChange={this.handleChange} autoComplete="email"/>
                </FormGroup>
                <FormGroup>
                    <Button color="primary" type="submit">Save</Button>{' '}
                    <Button color="secondary" tag={Link} to="/clients">Cancel</Button>
                </FormGroup>
            </Form>
        </Container>
    </div>
}
注意:这里还配置了一个链接,当点击 “Cancel” 按钮时,会路由到 /clients。
3.6、创建 AppNavbar 组件
为应用添加导航功能。
创建文件 frontend/src/AppNavbar.js:
import React, {Component} from 'react';
import {Navbar, NavbarBrand} from 'reactstrap';
import {Link} from 'react-router-dom';

export default class AppNavbar extends Component {
    constructor(props) {
        super(props);
        this.state = {isOpen: false};
        this.toggle = this.toggle.bind(this);
    }

    toggle() {
        this.setState({
            isOpen: !this.state.isOpen
        });
    }

    render() {
        return <Navbar color="dark" dark expand="md">
            <NavbarBrand tag={Link} to="/">Home</NavbarBrand>
        </Navbar>;
    }
}
在 render 函数中,使用 react-router-dom 功能创建一个链接,以路由到应用的主页。
3.7、创建 Home 组件
该组件为应用的主页,包含一个按钮,用于跳转到之前创建的 ClientList 组件。
创建 frontend/src/Home.js 文件:
import React, { Component } from 'react';
import './App.css';
import AppNavbar from './AppNavbar';
import { Link } from 'react-router-dom';
import { Button, Container } from 'reactstrap';

class Home extends Component {
    render() {
        return (
            <div>
                <AppNavbar/>
                <Container fluid>
                    <Button color="link"><Link to="/clients">Clients</Link></Button>
                </Container>
            </div>
        );
    }
}
export default Home;
注意,在这个组件中,还使用了来自 react-router-dom 的 Link,它将导航到 /clients 。这个路由在下一步中进行配置。
3.8、使用 React Router
现在,使用 React Router 在组件之间导航。
修改 App.js:
import React, { Component } from 'react';
import './App.css';
import Home from './Home';
import { BrowserRouter as Router, Route, Switch } from 'react-router-dom';
import ClientList from './ClientList';
import ClientEdit from "./ClientEdit";

class App extends Component {
  render() {
    return (
        <Router>
          <Switch>
            <Route path='/' exact={true} component={Home}/>
            <Route path='/clients' exact={true} component={ClientList}/>
            <Route path='/clients/:id' component={ClientEdit}/>
          </Switch>
        </Router>
    )
  }
}

export default App;
如你所见,为创建的每个组件都定义了应用路由。
访问 localhost:3000 时,现在可以看到带有 Clients 链接的主页:
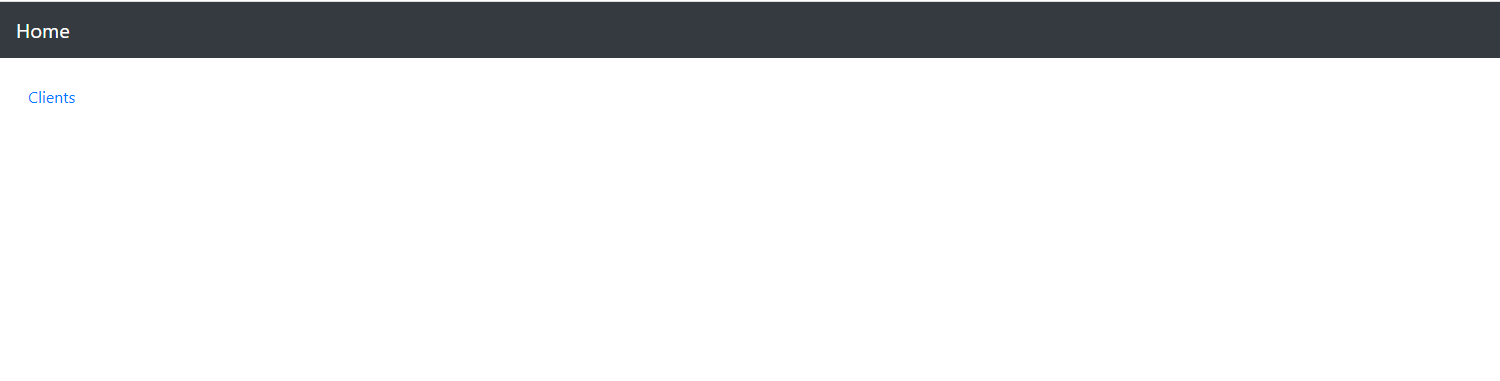
点击 Clients 链接,就可以看到 client 列表,以及 Edit、Remove 和 Add Client 功能:

4、构建打包
使用 frontend-maven-plugin Maven 插件来构建和打包 React。
该插件将负责打包前端应用并将其复制到 Spring Boot API 的 build 文件夹中:
<properties>
    ...
    <frontend-maven-plugin.version>1.6</frontend-maven-plugin.version>
    <node.version>v14.8.0</node.version>
    <yarn.version>v1.12.1</yarn.version>
    ...
</properties>
...
<build>
    <plugins>
        <plugin>
            <groupId>org.apache.maven.plugins</groupId>
            <artifactId>maven-resources-plugin</artifactId>
            <version>3.1.0</version>
            <executions>
                ...
            </executions>
        </plugin>
        <plugin>
            <groupId>com.github.eirslett</groupId>
            <artifactId>frontend-maven-plugin</artifactId>
            <version>${frontend-maven-plugin.version}</version>
            <configuration>
                ...
            </configuration>
            <executions>
                ...
            </executions>
        </plugin>
        ...
    </plugins>
</build>
maven-resources-plugin 详细配置如下,它负责将前端源代码复制到应用的 target 文件夹:
...
<plugin>
    <groupId>org.apache.maven.plugins</groupId>
    <artifactId>maven-resources-plugin</artifactId>
    <version>3.1.0</version>
    <executions>
        <execution>
            <id>copy-resources</id>
            <phase>process-classes</phase>
            <goals>
                <goal>copy-resources</goal>
            </goals>
            <configuration>
                <outputDirectory>${basedir}/target/classes/static</outputDirectory>
                <resources>
                    <resource>
                        <directory>frontend/build</directory>
                    </resource>
                </resources>
            </configuration>
        </execution>
    </executions>
</plugin>
...
front-end-maven-plugin 会安装 Node.js 和 Yarn,然后构建和测试前端应用:
...
<plugin>
    <groupId>com.github.eirslett</groupId>
    <artifactId>frontend-maven-plugin</artifactId>
    <version>${frontend-maven-plugin.version}</version>
    <configuration>
        <workingDirectory>frontend</workingDirectory>
    </configuration>
    <executions>
        <execution>
            <id>install node</id>
            <goals>
                <goal>install-node-and-yarn</goal>
            </goals>
            <configuration>
                <nodeVersion>${node.version}</nodeVersion>
                <yarnVersion>${yarn.version}</yarnVersion>
            </configuration>
        </execution>
        <execution>
            <id>yarn install</id>
            <goals>
                <goal>yarn</goal>
            </goals>
            <phase>generate-resources</phase>
        </execution>
        <execution>
            <id>yarn test</id>
            <goals>
                <goal>yarn</goal>
            </goals>
            <phase>test</phase>
            <configuration>
                <arguments>test</arguments>
                <environmentVariables>
                    <CI>true</CI>
                </environmentVariables>
            </configuration>
        </execution>
        <execution>
            <id>yarn build</id>
            <goals>
                <goal>yarn</goal>
            </goals>
            <phase>compile</phase>
            <configuration>
                <arguments>build</arguments>
            </configuration>
        </execution>
    </executions>
</plugin>
...
注意:可以编辑 pom.xml 中的 node.version 属性来指定不同的 Node.js 版本。
5、运行 Spring Boot React CRUD 应用
一切就绪后,通过插件启动应用:
mvn spring-boot:run
React 前端已经集成到了 Spring Boot 应用,可以通过 http://localhost:8080/ 访问。
6、总结
本文介绍了如何使用 Spring Boot 和 React 创建一个 CRUD 应用,以及如何把 React 前端集成打包到 Spring Boot 后端应用中。
Ref:https://www.baeldung.com/spring-boot-react-crud
